Monday, November 28, 2022

TANKSGIVING - Toy for Tots

 This past Thanksgiving week there were a number of games played in support of the Toy for Tots Charitie. The Bulge games were run on Wednesday, Friday and Saturday. The North Africa games on Wednesday and Saturday, and to round it off a massive Team Yankee game on Saturday as well. Credit goes to HMGS Midwest, Games Plus in Mount Prospect and the Wednesday Night Historical Group who provided the games, space, models and a host of participants. They raised over 80 toys for this worthwhile endeavor.  

I personally participated in the Wednesday North Africa game on the British side, but no others as my work schedule required me elsewhere. I did get to glance in on the games throughout the days, and it looked like a good time was had by everyone. 

North Africa was a Meeting Engagement with the British Vs the Italians in 1940. There was a large mix of armor on both sides. In this timeframe the Italian armor is very good compared to the British. Both sides launched drives from their respective right flanks. The British was tied down until late in the game when they finally started making headway, but too late to be decisive. The Italians did much better and were only stopped at the last moments by the British pulling reinforcements from their center to stem the tide. 


British Starting Point. Australian Mixed Armor, Infantry and Artillery Support on Each Flank Stands British Armor. 

In the Center the Italians Held a Dominate Ridgeline That Held Up British Forces.

British Bring up Australian Reserves to try and Break the Center Deadlock to no Avail.  

On the British Left the Italians Advance with Massed Armor Supported by 90mm Anti-tank Guns.

This Proved Very Effective with Only a Last-Minute Reinforcement from the Center Stopping the Advance Short of Their Objective (Burned Out Tank Bottom of Picture).  

On the British Right Italian Light and Medium Tanks Stall the British for Most of the Game. 

Finally, in the Last Few Turns the British Make a Breakthrough, but it is too Late to be of Any Real Effect. 
In the end the game was a draw with both sides heavily bloodied.
British Command Observes the Carnage Safely from the Rear. 

As this Bulge game was going on simultaneously with the North Africa event, I was unable to get details. The Americans were tasked with holding off an attack by the Gross Deutschland forces along a wide front. In the end accurate German artillery fire and superior tank tactics won the day, giving the Germans a minor victory. 
Start of the Game Showing the US Center.


On Their Right US Tanks Await Behind Cover for the German Advance. 


German Center Advances

And is Slowed by some Accurate Fire. 

German Advances in the Center Continue as US Casualties Begin to Mount Up. 

On the American Right More Disaster Continues. 

On the Left Having Secured the Town the Germans Begin Turning the Flank. 

Near Games End and the Grim Harvest of the American Defense on the Left. 

Thursday, November 24, 2022

THE HOUSING BOOM

 This week between getting the house ready for the Thanksgiving Feast I worked on getting buildings done for my upcoming game projects. The first is a few 3D printed buildings I got from my local friendly game store. These are designed as fantasy theme but work well for my 19th Century project.  Again, I did nothing fancy here, just a couple of layers to add depth. 

A quick slop coat of Black, Dark Sea Grey and Khaki to roof, walls and stonework.


Added Off White, Chocolate Brown to the walls. 

Added Basalt and London Grey to roof. Added Stone to, well stonework and a bit of color to the doors.

A view on the table. 

Warlord Epic ACW Figures for Scale. 

Monday, November 21, 2022

BATTLE OF ROLLING MEDOWS - Fall Campaign Battle 4

With three victories under their belts, the Union of Pacts Commonwealth was well in the lead in the Fall Campaign. This was a do or die battle for the Empire. They needed this win, or the campaign would be over. 

The setting was as follows:

United Packs Commonwealth forces had been scouting a large Empire force advancing from the west, when something unusual for the UPC occurred. They lost track of them. The UPC Senate ordered the army to take up suitable blocking positions along all major avenues into the heart of their territory, with orders for each force to be prepared to send immediate aid to the other dispersed groups as soon as the enemy was located.

A surprised fight on both sides commenced when the UPC’s Advanced Cavalry force accidently bumped into a major Empire infantry group. As more and more Empire forces arrived throughout the day the UPC found itself forced to give ground, but still managing to hold a strong defensive position as night fell. Even as the sun was falling additional UPC forces began to arrive and fortify themselves on the nearby hills. In the morning the Empire realized that they substantially outnumbered their opponents, and by mid-morning began a general assault across the entire line.

Lines are drawn and battle is about to commence. Will this massive Empire army defeat the UPC, or will the Union find the skill to hold here and keep the Empire out of their Heartlands?

 Victory Conditions: The Empire needs to break the Union of Pacts Commonwealth forces by days end, while maintaining a strong force of their own.

The battle was fought on two separate tables, an all-cavalry battle where the victor could move onto the main table to lend their weight, and a larger conflict between both sides' infantry. 

The Cavalry Battle Table.

The Empire's Cavalry. 

The Smaller UPC Cavalry Force. 

The Start of the Infantry Battle. The Empire Forces on the Left and at the Top. UPC Forces on the Right. 

The Angle. Empire Forces on the Bottom and Right. UPC at the Top Left. The Slot in Front (behind the lone command figure) is Where the Victorious Cavalry will Arrive From.

Swarming the Hills and Valley both sides Forces Immediately Charge into Their Foes. Casualties are About Even, but the Empires Numbers are Beginning to Tip the Scales. 

Both Cavalry Forces Battered, but the Empire is Close to Finishing Off the UPC cavalry.

Last Desperate Stand of the UPC Cavalry. The Empire Cavalry Ready to Move Off and Join the Main Battle. 

Empire Forces Begin Their General Assault Along the Entire Ridge. 

The UPC Defenders Concentrate Their Artillery at the Angle, While Sending Their Infantry Reserves to Reinforce the Ridge.   

Dewdrop Hill Looking Very Vulnerable to the Masses of Empire Infantry Advaning on it. 

At Dewdrop Hill Concentrated Fire from UPC Artillery and Infantry See Off the First Line of Empire Troops. 

The UPC Shows Their Aggressive Nature that has Won Them so Many Battles by Launching Their Light Infantry on a Flanking Assault of the Empire's Second Line at Dewdrop Hill. 

By Continuous Fire and Advance the UPC Light Infantry Stall the Dew Drop Hill Assault. It Cost Them Dearly, as the Full Force of the Empire Infantry and Artillery Finally Finished Them Off Shortly After This. 
Empire weight of numbers proved nearly unstoppable. All across the ridge UPC infantry was thrown into flight, and after their light infantry was lost the full force of the Empire broke the angle. 
But what of the cavalry?...
It seemed the UPC cavalry had done its job. It had delayed the Empire's cavalry from joining the battle, but at a horrific cost. Only the UPC light cavalry remained after the encounter. 
With victory in their grasp the Empire forces began to race into the gap behind the UPC defenders on the Ridge. However, it was not to be. The cost to both armies had been too high and armies broke simultaneously. Without this victory the Empire had lost the campaign and both sides limped back to their respective winter quarter. Many howls of lamentation would be heard all winter long throughout all the lands after the bloody battle of Rolling Meadows.

Thursday, November 17, 2022

BATTLE OF RIDGEVILLE - Spring Campaign Battle 4


The United Packs Commonwealth held off a determined attack by the Empire at the Battle of Gross Point. Victory was a near thing as both armies were at the breaking point. As the Empire withdraws it is caught by the closely pursuing UPC forces intent on the destroying this army once and for all.

The Empire forces are attempting a fighting withdraw through a narrow valley. Their goal is to retreat at least half the army off the table to the south. The UPC is in hot pursuit, try to break the attacks from the south.  

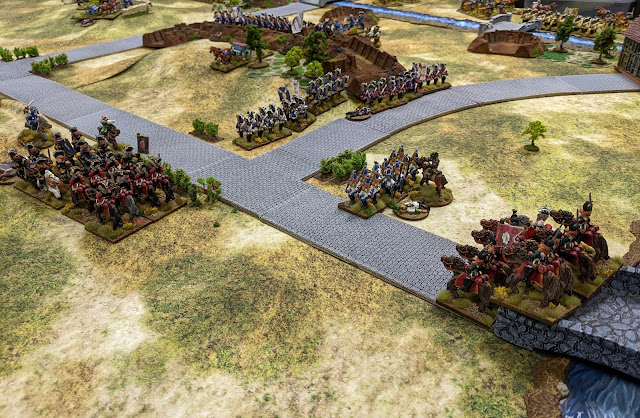
The Starting Positions of Both Armies as Seen from the East. Empire Forces on the Left, and Their UPC Opponents on the Right.


Another Shot of the Starting Positions, This Time from the West. The River is Fordable Along its Length. The UPC on the Left, and Empire on the Right. 

Here is the Opening as Seen from the North. The UPC's Flanking Cavalry can be Seen on the Upper Left Side. 

The UPC Cavalry Triumphant Over Their Empire Cavalry 

The Unstoppable UPC Advance
This was a strange game, as the Empire whose goal was to delay the UPC and retreat their army instead choice to make a headlong unsupported cavalry charge into the heart of the UPC's massed infantry and cavalry. While on the opposite flank holding in place as the UPC infantry out gunned and out maneuver them. It was so unexpected and over so fast I was in shock, forgetting to take pictures of the three early turns. 

Thursday, November 10, 2022

IT'S HOBBY TIME - PART 1


It is now late fall and here where I live the leaves are changing, the days growing cooler and shorter. Like the squire with its nuts, I am priming figures like crazy to lay in a stock for painting when the snow falls. I currently have five projects in the painting cue, with around 300 done and more to follow. I won't get to them all, but they are ready when my paint brush calls. 

I am currently working on 15mm Medieval using the Joan of Arc: Time of Legends figures. Great figures and they came with a new set of rules. This is a bonus as I collect miniature rules sets. I even play some of them. This is my second project using the Army Painter: SpeedPaint. I really like this paints effects and I get good tabletop quality in very little time when compared to my standard painting style. There are 238 figures in the set, and I will use around 200 for my games. They will be used to play One Hour Wargames, Portable Wargame, TSR's Chainmail, or something I have yet to write. You never know. I may use them to even play the Joan of Arc game. 

I did nothing fancy with these. Mostly it is just straight SpeedPaint, with the exception of the metal. I first painted that in Grim Black, then a dry brush of Vallejo Oily Steel. All very quick and simple. I am getting 12 figures done in around an hour, to an hour and a half. For me that is flying. 


Monday, November 7, 2022

THE BATTLE OF GROSS POINT CROSSING - Spring Campaign Battle 3

As the war rages back and forth the Empire shifts its focus from the southern sector to the east. They encounter the well-fortified Commonwealth positions along the Big Wet Prairie River at the Gross Point Crossings. Undaunted, they mass and are set to assault the position head on. 

The key objectives for the Empire would be to take the bridges across the Big Wet Prairie River and break the fortified hill position of the UPC.
The Battlefield Looking West Across the Big Wet Prairie River. The Key UPC Defenses are in the Center.  
The Starting Positions with the Empire at the Bottom and UPC Top

The Starting Positions Facing East from Behind the UPC Entrenchments.

The Starting Positions Looking North. The UPC Fortifications in Top Center, Garrison in Gross Point Village, with the Empire Battleline Stretching Along the Right Side.  

The Empires Initial Assault on Gross Point Village. The Lead Empire Battalion, (Hollingsworth's) Suffering Heavy Casualties from the UPC Baysnight Grenadiers Accurate Fire.   

The Empire's Combined Fire from Artillery and Infantry have Driven Off the UPC Light Infantry Holding Redoubt C, Opening up the River Line for Assault. 

Overview of the Early Point of the Battle. The Empire's Flanking Assault on the South Bridge can Just be Seen in the Upper Left Corner. 

Early Battle View Looking South. The Empire's Assault on the South Bridge and Supporting Cavalry can be Seen at the Top. To the Upper Left is the Empire's Massed Attack on Gross Point Village. 

Mid Battle. Swift's Regiment of Cuirassier for the UPC Have Driven the Empire's Lord Pawling's Cuirassier Back Across the South Bridge, Thus Splitting the Empire's Infantry on the North Side of the Bridge in Two. 

The Battle Swings Back the Other Way as Massed Empire Cavalry Drives Back Across the South Bridge, but the Time Taken has Allowed the UPC Infantry to Form a Battleline to Meet the Threat. 

Having Driven All the UPC Infantry from the Forward Redoubts and Captures the Bridges Along the River the Empire Begins the Assault on the Now Under Manned Main Fortifications. 

Massed and Ready the Empire Starts the Attack on the UPC's Walled Enclosure. Both Armies are Nearing Collapse from the Intense Fighting of the Day. Will this Final Assault be Enough to Break the UPC?  

The Scene at the Battles End. The UPC Assailed on all Sides but Still Holding On. How Had the Defenders Managed This?  

The Heroes of Gross Point Village. They Stopped Every Attempt to Dislodge Them and Because of Their Efforts Lead to the Breaking of the Empire's Forces at the Battle.
EPPELOG: This was a very close-run game. Both sides were on the brink of army collapse and the Empire players could taste victory in their next turns assaults, but it was not to be. The UPC's Baysmoon Grenadiers did what they had done all game and broke the last attackers sent against them. 
Victory Points stand at: Empire 1, UPC 3

THE BATTLE OF LOBOWITZ

 This last weekend I ran a game of Post of Honor for two new players, and a pair of veterans. The game was the battle of Lobowitz, the first...